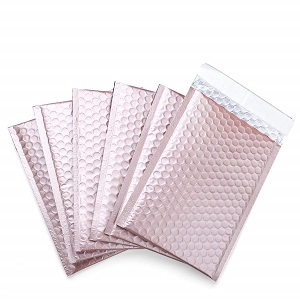
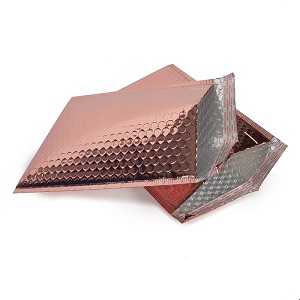
In the world of shipping and packaging, metallic bubble mailers have emerged as a popular choice for both businesses and individuals. These unique mailers combine the protective qualities of bubble wrap with a sleek, metallic exterior, making them not only functional but also visually appealing. If you’re wondering how to effectively use metallic bubble mailers, this guide will walk you through the process step by step.
## What Are Metallic Bubble Mailers?
Metallic bubble mailers are padded envelopes that feature a layer of bubble wrap sandwiched between two layers of metallic film. This design provides excellent cushioning for fragile items while also offering a shiny, eye-catching appearance. They are available in various sizes and colors, making them suitable for a wide range of products, from jewelry and electronics to clothing and cosmetics.
## Why Choose Metallic Bubble Mailers?
1. **Protection**: The bubble wrap interior offers superior cushioning, protecting your items from impact during transit.
2. **Water Resistance**: The metallic exterior is often water-resistant, providing an extra layer of protection against moisture.
3. **Lightweight**: These mailers are lightweight, which can help reduce shipping costs.
4. **Aesthetic Appeal**: The shiny surface adds a touch of elegance, making them ideal for special occasions or high-end products.
## How to Use Metallic Bubble Mailers
### Step 1: Choose the Right Size
Before you start packing, it’s essential to select the appropriate size of metallic bubble mailer for your item. Measure your product and choose a mailer that provides a snug fit without being too tight. A well-fitted mailer will ensure that your item doesn’t shift during transit, reducing the risk of damage.
### Step 2: Prepare Your Item
If your item is fragile, consider wrapping it in additional protective material, such as tissue paper or foam, before placing it inside the mailer. This extra layer of protection can help absorb shocks and prevent scratches.
### Step 3: Insert Your Item
Carefully place your item inside the metallic bubble mailer. Ensure that it is centered and that there is enough bubble wrap surrounding it for adequate cushioning. If you’re shipping multiple items, make sure they are separated by additional padding to prevent them from colliding during transit.
### Step 4: Seal the Mailer
Most metallic bubble mailers come with a self-sealing adhesive strip. Once your item is securely inside, remove the protective strip and press down firmly to seal the envelope. For added security, you can use packing tape to reinforce the seal, especially if you’re shipping heavier items.
### Step 5: Label Your Package
After sealing the mailer, it’s time to label your package. Write the recipient’s address clearly on the front of the mailer, and include your return address in case the package needs to be returned. If you’re using a shipping service, affix the shipping label securely to the mailer.
### Step 6: Ship Your Package
Finally, take your metallic bubble mailer to your preferred shipping carrier. Depending on the weight and dimensions of your package, you may have various shipping options available, including standard, expedited, or international shipping.
## Conclusion
Using metallic bubble mailers is a straightforward process that can significantly enhance the protection and presentation of your shipped items. By following these steps, you can ensure that your products arrive safely and in style. Whether you’re a small business owner or simply sending a gift to a friend, metallic bubble mailers are an excellent choice for all your shipping needs.
Post time: Dec-31-2024


